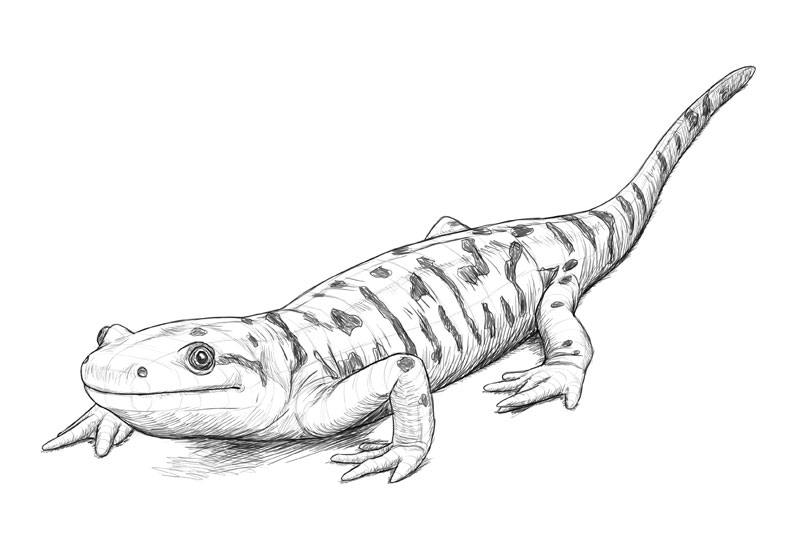
how to draw a 3d church
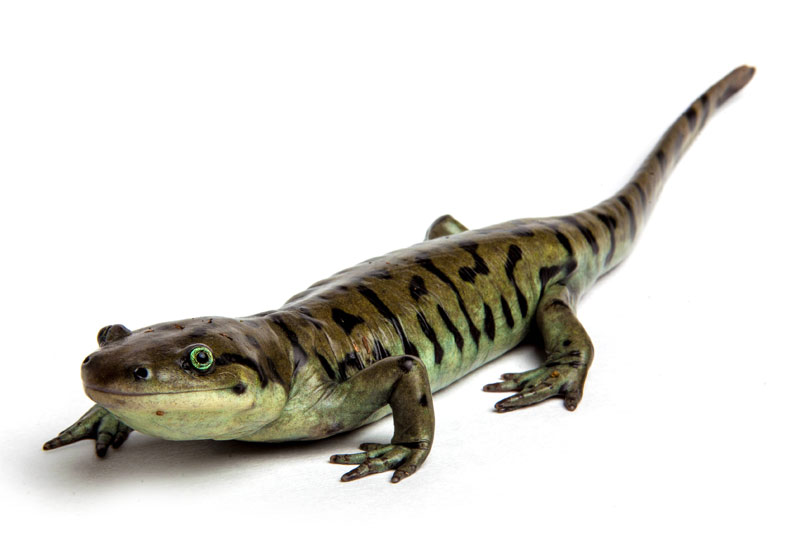
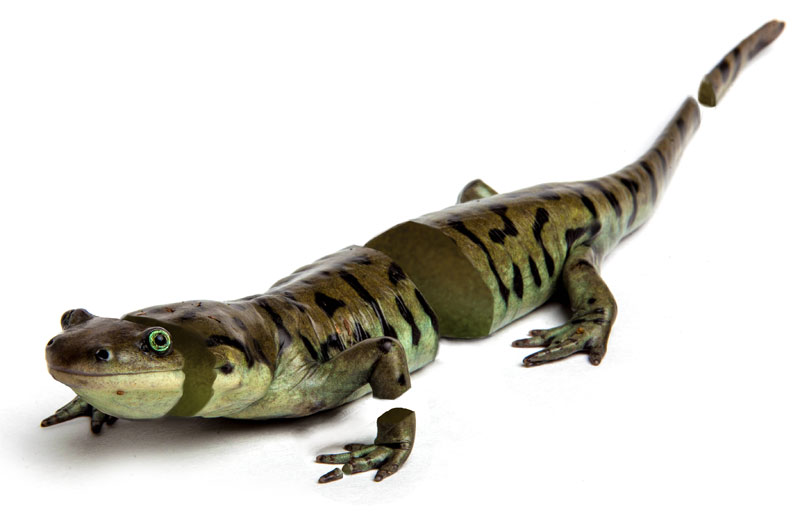
Drawing is an fine art of illusion—flat lines on a flat canvass of paper look like something existent, something full of depth. To reach this issue, artists use special tricks. In this tutorial I'll testify you these tricks, giving you lot the fundamental to drawing iii dimensional objects. And we'll do this with the help of this cute tiger salamander, as pictured by Jared Davidson on stockvault.
Why Certain Drawings Expect 3D
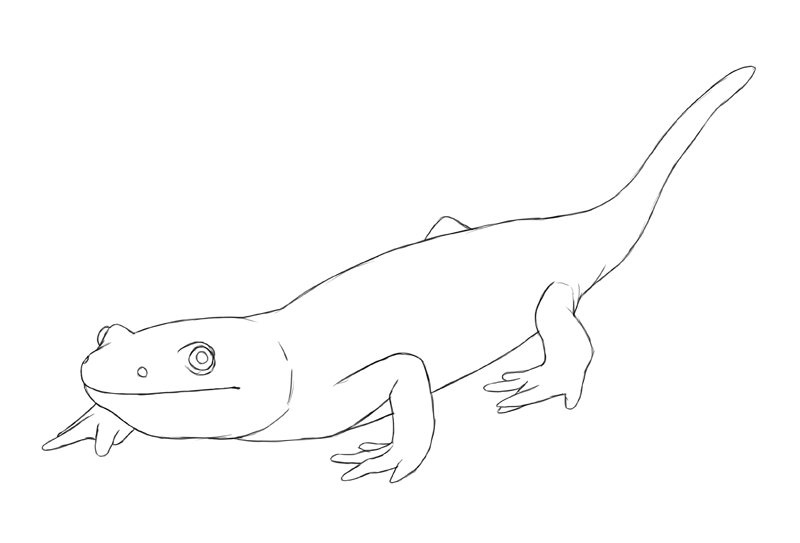
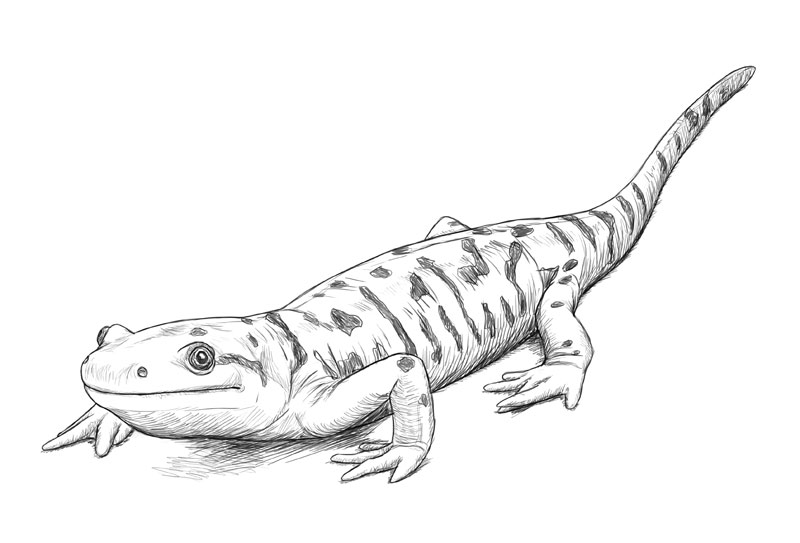
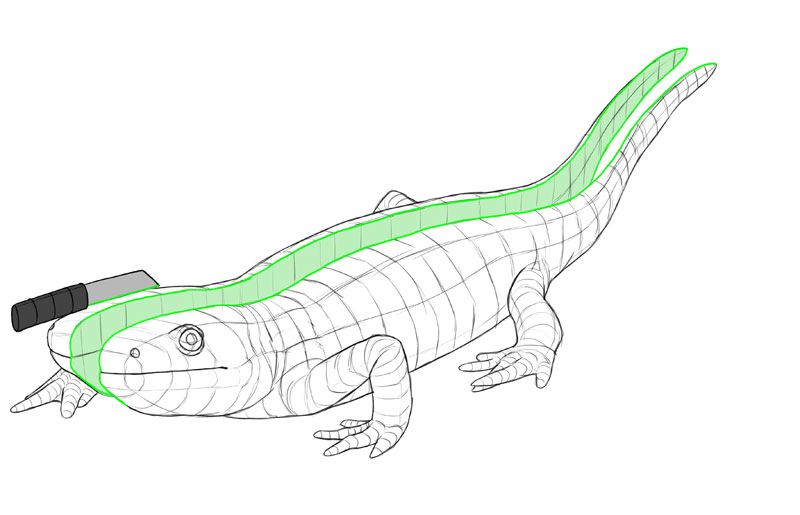
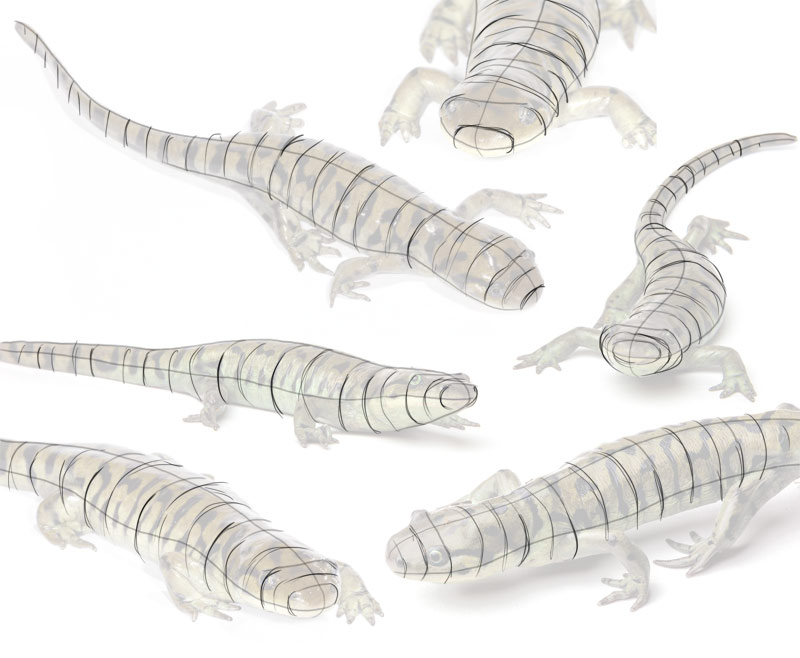
The salamander in this photo looks pretty three-dimensional, right? Let'south turn it into lines now.
Hm, something'due south wrong here. The lines are definitely correct (I traced them, after all!), but the drawing itself looks pretty flat. Sure, it lacks shading, but what if I told you that y'all can draw three-dimensionally without shading?
I've added a couple more lines and… magic happened! Now it looks very much 3D, perhaps even more than the photo!
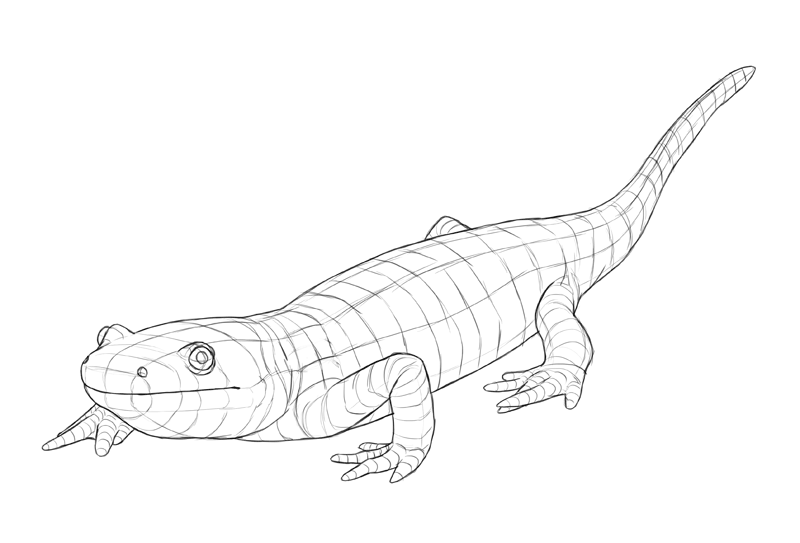
Although you lot don't run into these lines in a last drawing, they touch the shape of the pattern, skin folds, and even shading. They are the primal to recognizing the 3D shape of something. And then the question is: where do they come up from and how to imagine them properly?
3D = 3 Sides
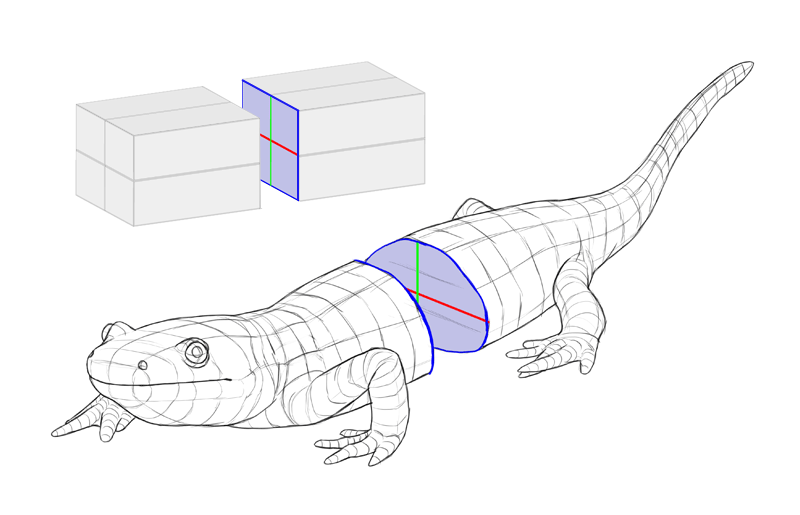
As yous remember from schoolhouse, 3D solids accept cross-sections. Because our salamander is 3D, it has cross-sections as well. So these lines are nothing less, nothing more, than outlines of the body'southward cross-sections. Here's the proof:
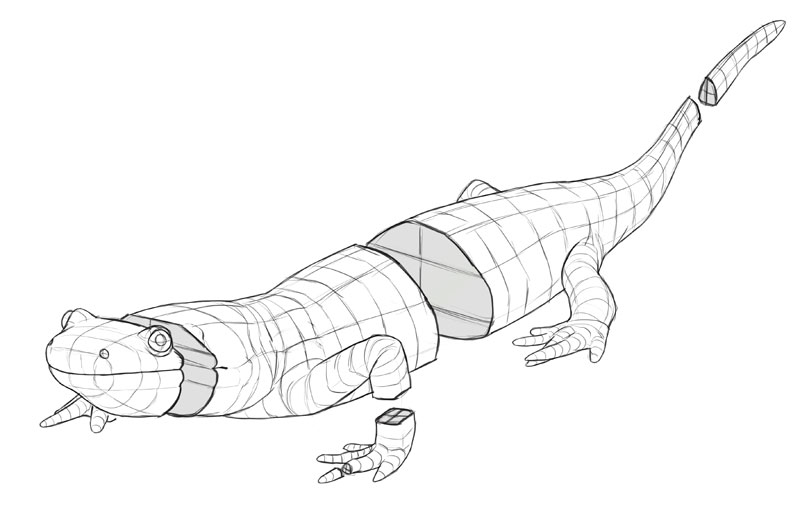
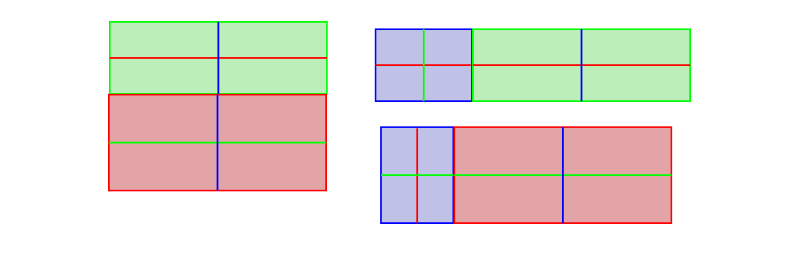
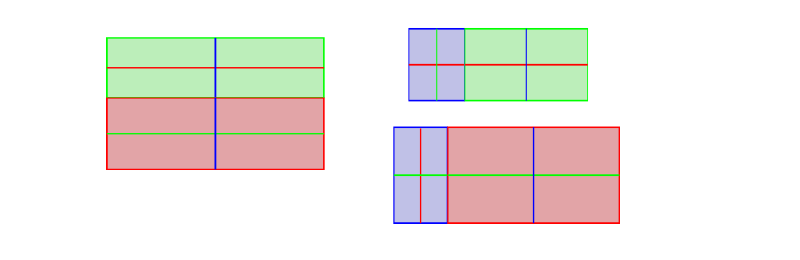
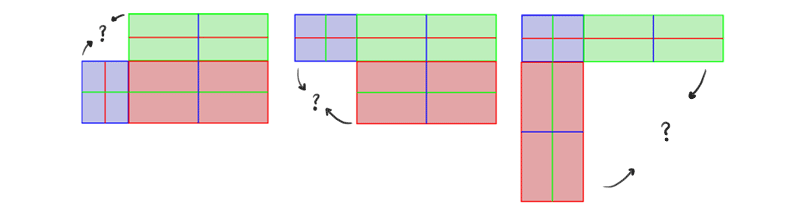
A 3D object tin can be "cut" in 3 unlike ways, creating three cross-sections perpendicular to each other.

Each cross-department is 2nd—which means it has two dimensions. Each one of these dimensions is shared with i of the other cross-sections. In other words, 2d + 2nd + 2D = 3D!
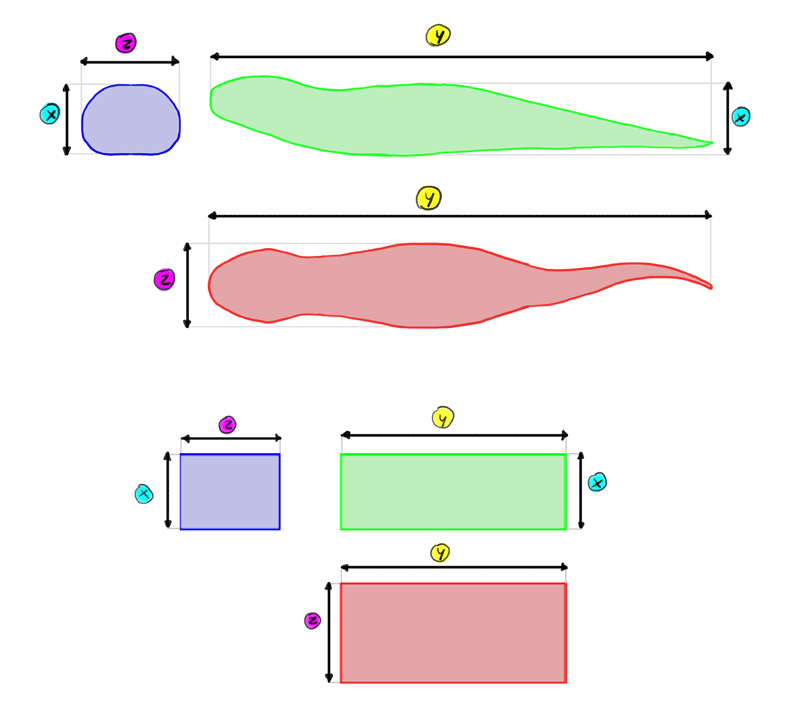
And then, a 3D object has three 2D cross-sections. These three cross-sections are basically three views of the object—here the greenish one is a side view, the blue one is the front/back view, and the ruby-red i is the top/lesser view.
Therefore, a cartoon looks 2D if you tin just meet 1 or two dimensions. To brand it look 3D, y'all need to show all iii dimensions at the same time.
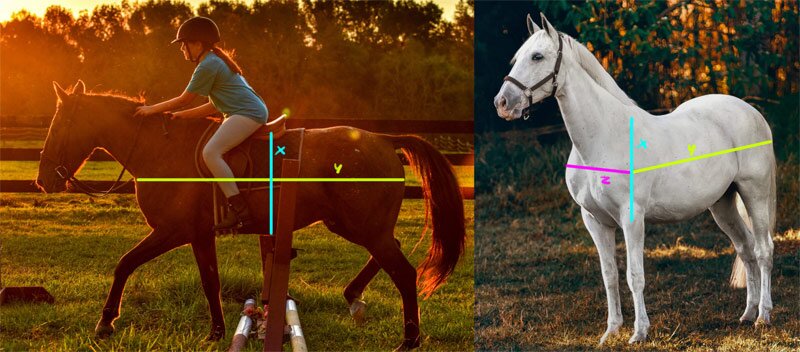
To arrive even simpler: an object looks 3D if you can see at least two of its sides at the aforementioned fourth dimension. Here you can encounter the top, the side, and the forepart of the salamander, and thus it looks 3D.
Just expect, what'south going on here?
When you look at a second cross-section, its dimensions are perpendicular to each other—there's right angle betwixt them. Only when the same cross-section is seen in a 3D view, the angle changes—the dimension lines stretch the outline of the cross-section.
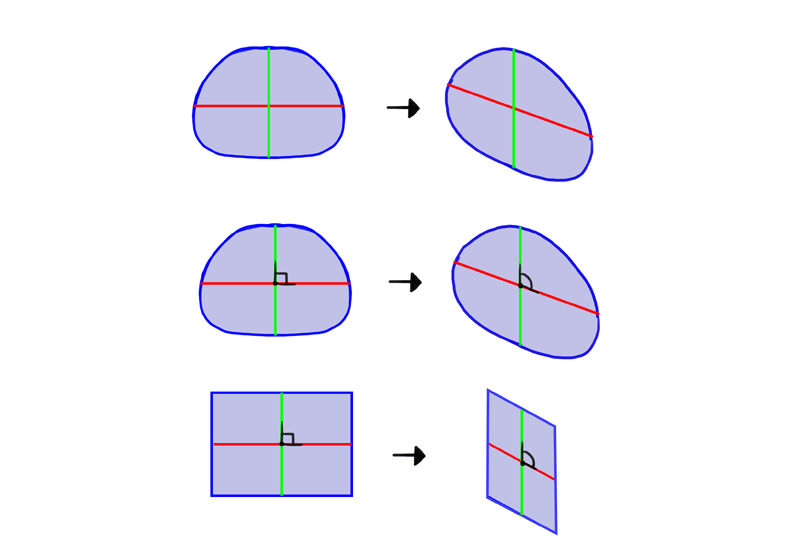
Let's do a quick recap. A single cross-section is easy to imagine, simply it looks flat, because it's 2D. To make an object look 3D, you need to show at least two of its cross-sections. But when you describe two or more cross-sections at once, their shape changes.
This alter is not random. In fact, it is exactly what your brain analyzes to empathise the view. So there are rules of this change that your subconscious heed already knows—and at present I'm going to teach your witting self what they are.
The Rules of Perspective
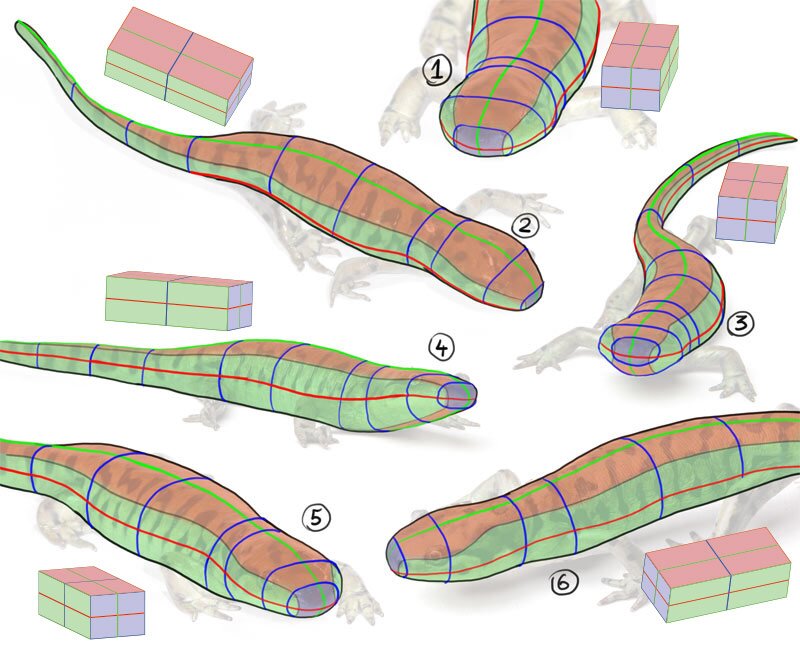
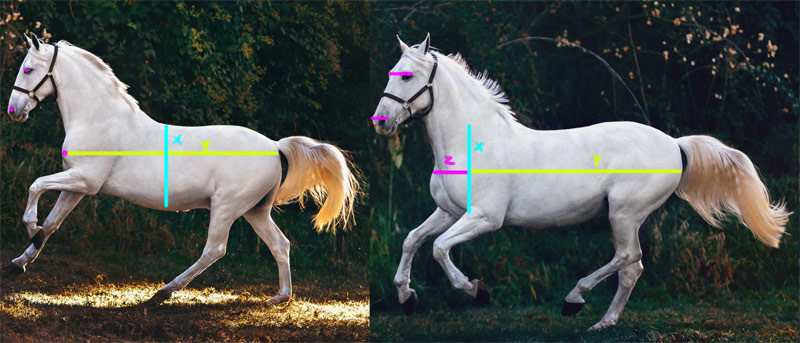
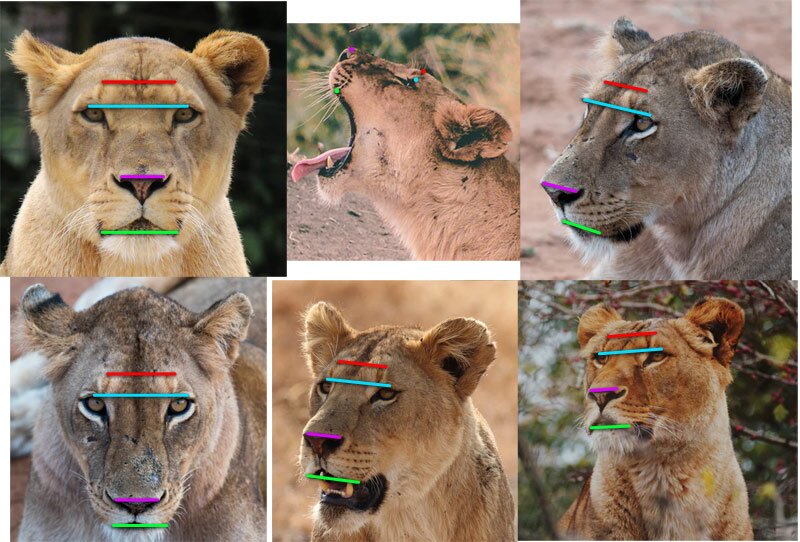
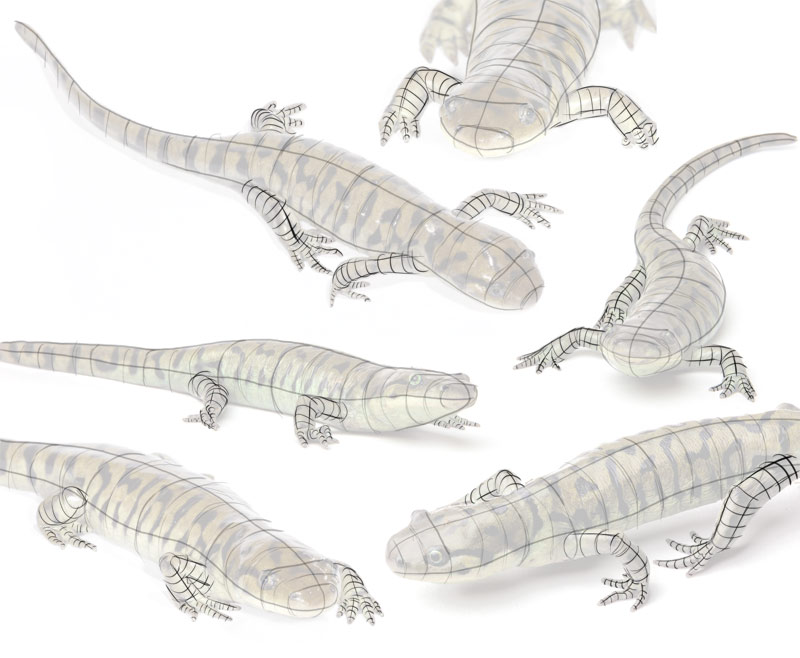
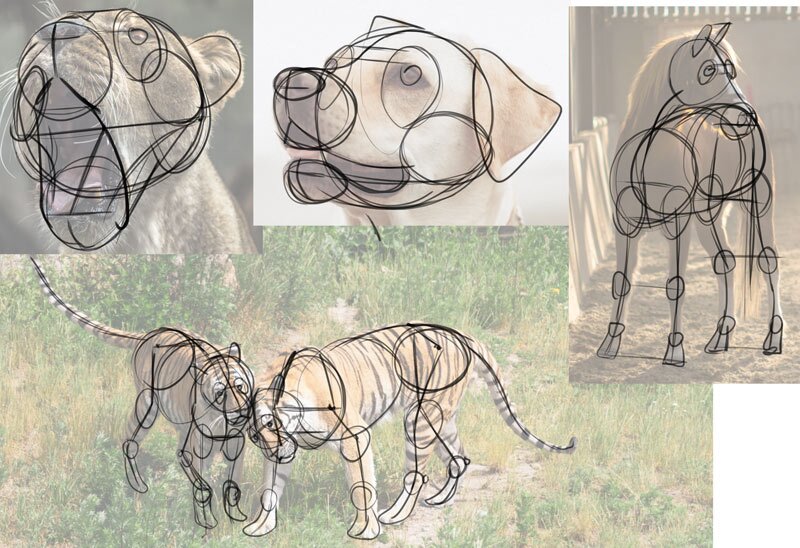
Here are a couple of different views of the same salamander. I accept marked the outlines of all three cross-sections wherever they were visible. I've likewise marked the top, side, and front. Take a good look at them. How does each view bear on the shape of the cross-sections?
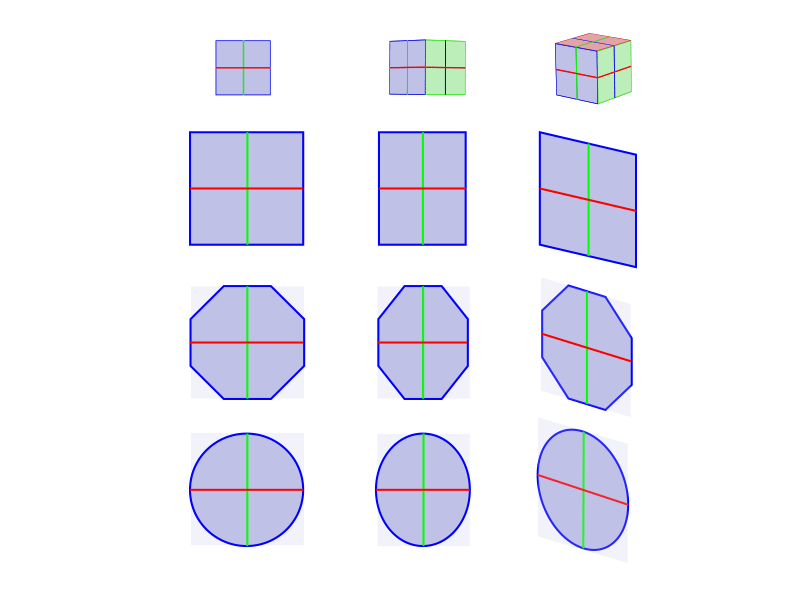
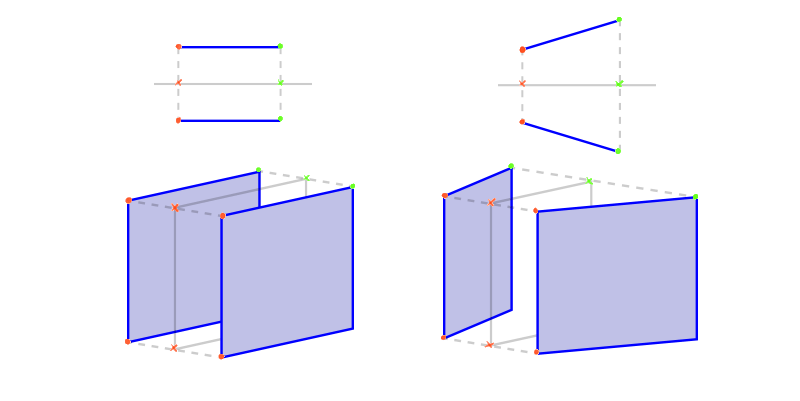
In a 2D view, you lot have ii dimensions at 100% of their length, and one invisible dimension at 0% of its length. If you use 1 of the dimensions as an centrality of rotation and rotate the object, the other visible dimension will give some of its length to the invisible ane. If you keep rotating, one will keep losing, and the other will keep gaining, until finally the commencement one becomes invisible (0% length) and the other reaches its total length.
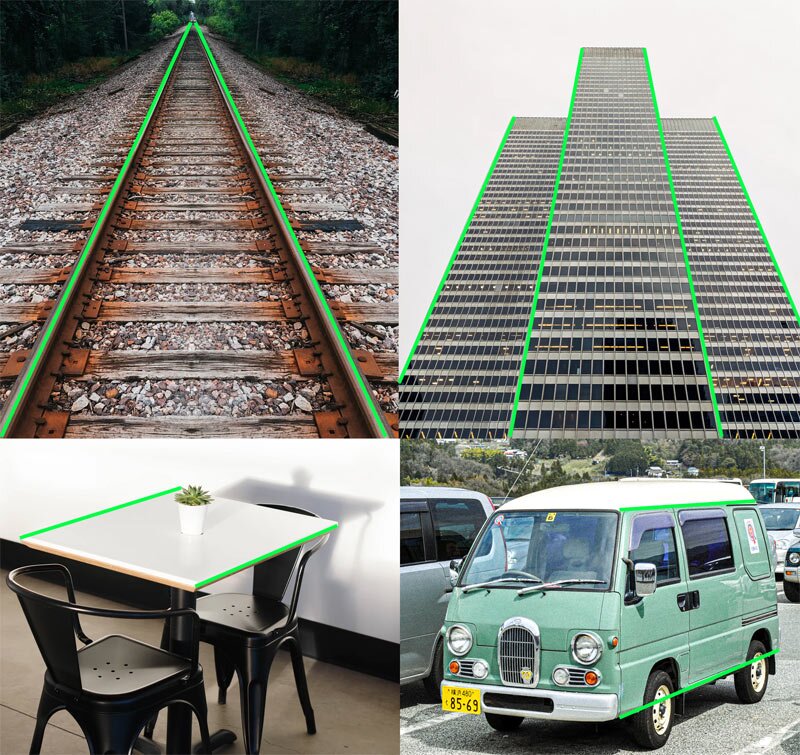
But… don't these 3D views look a footling… flat? That's right—there's ane more thing that we need to take into account here. There's something called "cone of vision"—the farther y'all look, the wider your field of vision is.

Because of this, you can encompass the whole world with your manus if you identify it right in front of your eyes, but information technology stops working like that when yous move it "deeper" within the cone (farther from your eyes). This too leads to a visual modify of size—the farther the object is, the smaller information technology looks (the less of your field of vision it covers).
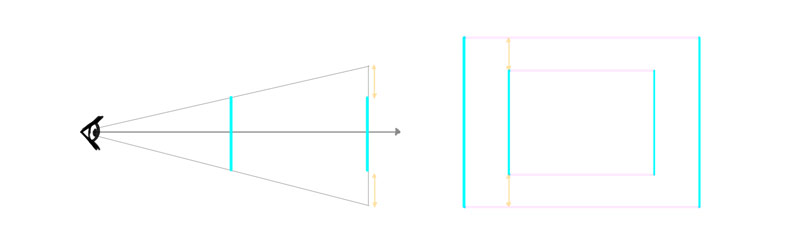
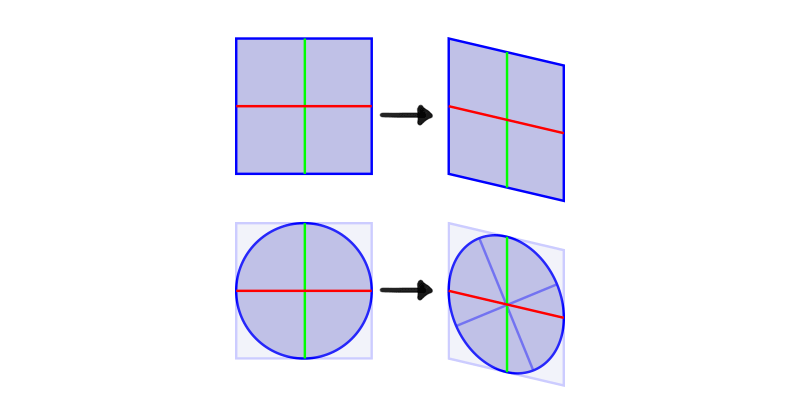
Now lets plough these 2 planes into two sides of a box by connecting them with the 3rd dimension. Surprise—that third dimension is no longer perpendicular to the others!
So this is how our diagram should really look. The dimension that is the axis of rotation changes, in the end—the edge that is closer to the viewer should exist longer than the others.
Information technology's important to remember though that this furnishings is based on the distance between both sides of the object. If both sides are pretty shut to each other (relative to the viewer), this upshot may be negligible. On the other hand, some camera lenses can exaggerate it.
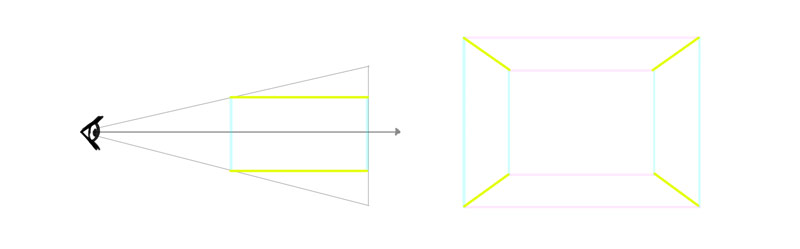
And so, to draw a 3D view with two sides visible, you place these sides together…
… resize them accordingly (the more of ane you want to bear witness, the less of the other should exist visible)…
… and make the edges that are farther from the viewer than the others shorter.

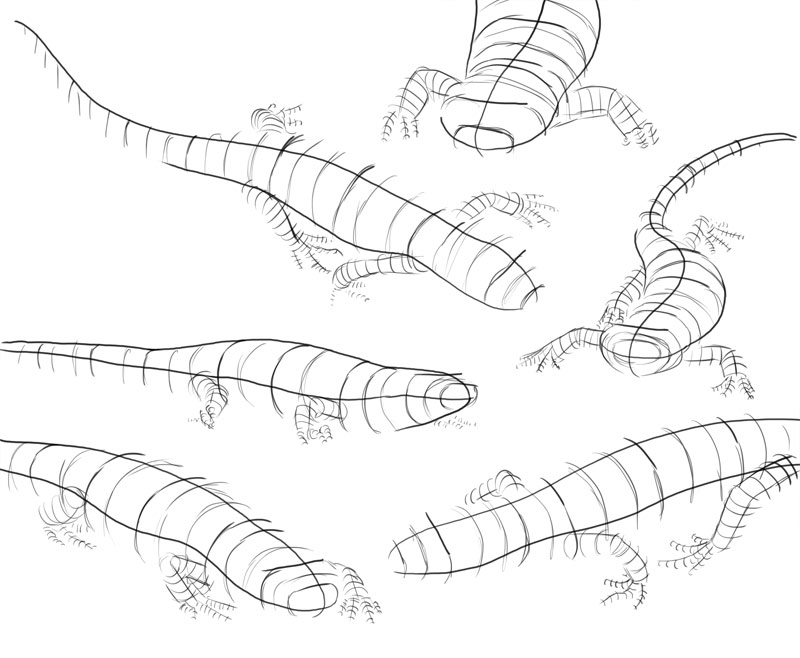
Here's how it looks in exercise:
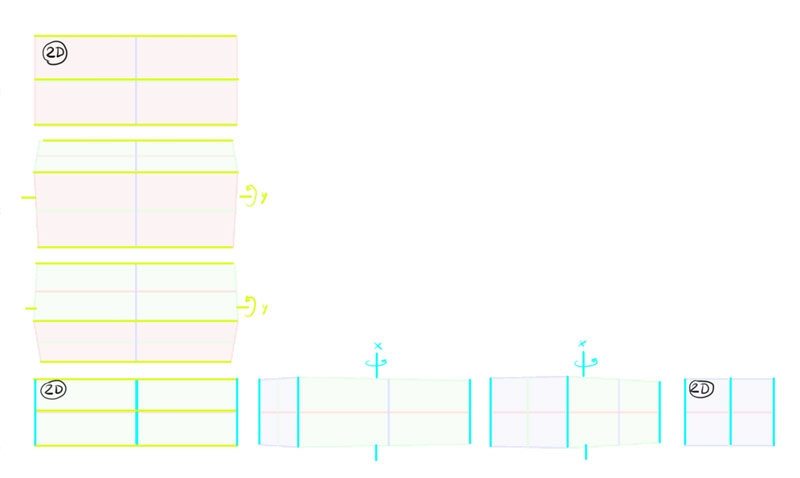
Just what almost the 3rd side? It'south impossible to stick information technology to both edges of the other sides at the aforementioned fourth dimension! Or is it?
The solution is pretty straightforward: cease trying to keep all the angles correct at all costs. Slant one side, then the other, and then brand the third one parallel to them. Easy!
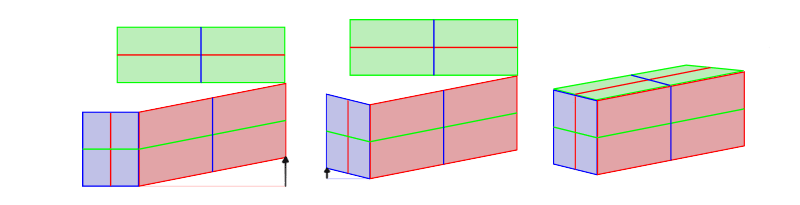
And, of course, let's not forget well-nigh making the more than distant edges shorter. This isn't e'er necessary, only it's good to know how to do information technology:

Ok, so y'all need to camber the sides, but how much? This is where I could pull out a whole set of diagrams explaining this mathematically, but the truth is, I don't do math when drawing. My formula is: the more y'all slant ane side, the less y'all slant the other. Just look at our salamanders over again and cheque information technology for yourself!
Merely if you lot want to depict creatures like our salamander, their cross-sections don't really resemble a square. They're closer to a circle. But like a square turns into a rectangle when a 2nd side is visible, a circle turns into an ellipse. But that's not the end of it. When the third side is visible and the rectangle gets slanted, the ellipse must get slanted too!
How to camber an ellipse? Just rotate it!
This diagram tin assistance you memorize information technology:
Multiple Objects
So far we've only talked about cartoon a single object. If you want to draw two or more objects in the same scene, there'due south usually some kind of relation betwixt them. To show this relation properly, decide which dimension is the axis of rotation—this dimension will stay parallel in both objects. Once you do information technology, y'all can do any you want with the other two dimensions, as long every bit you follow the rules explained earlier.
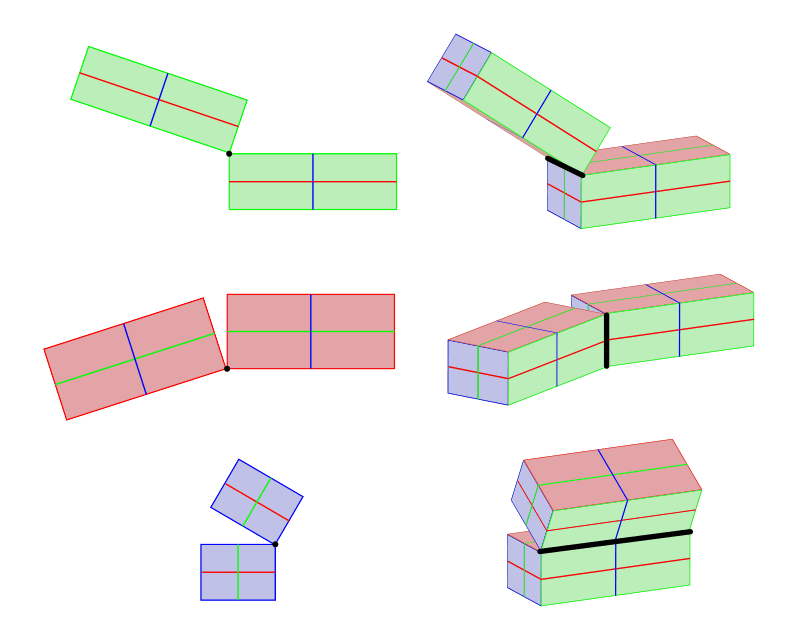
In other words, if something is parallel in 1 view, so it must stay parallel in the other. This is the easiest way to check if you got your perspective right!
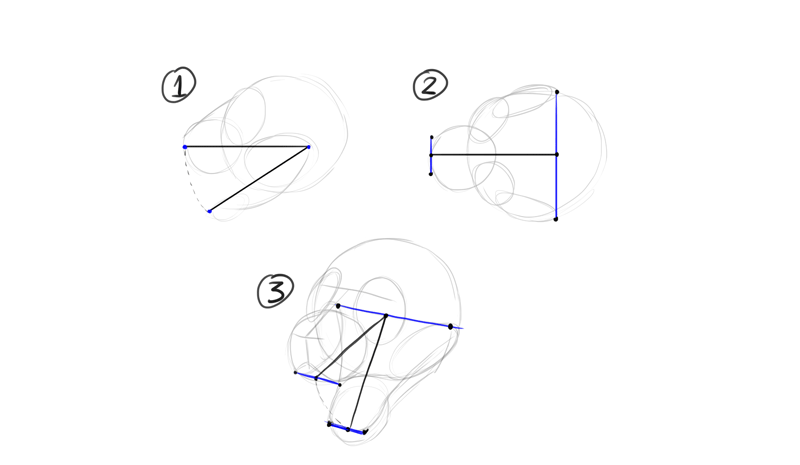
There'southward another type of relation, chosen symmetry. In 2d the axis of symmetry is a line, in 3D—it's a plane. Just it works just the same!
Y'all don't need to draw the plane of symmetry, but you lot should be able to imagine information technology right betwixt two symmetrical objects.
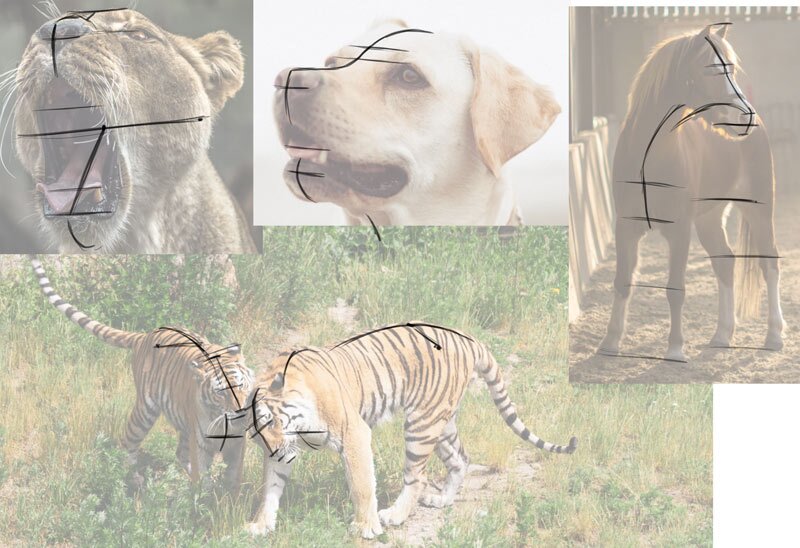
Symmetry will aid yous with difficult cartoon, similar a caput with open jaws. Here figure 1 shows the angle of jaws, figure 2 shows the axis of symmetry, and effigy 3 combines both.
3D Drawing in Practice
Exercise 1
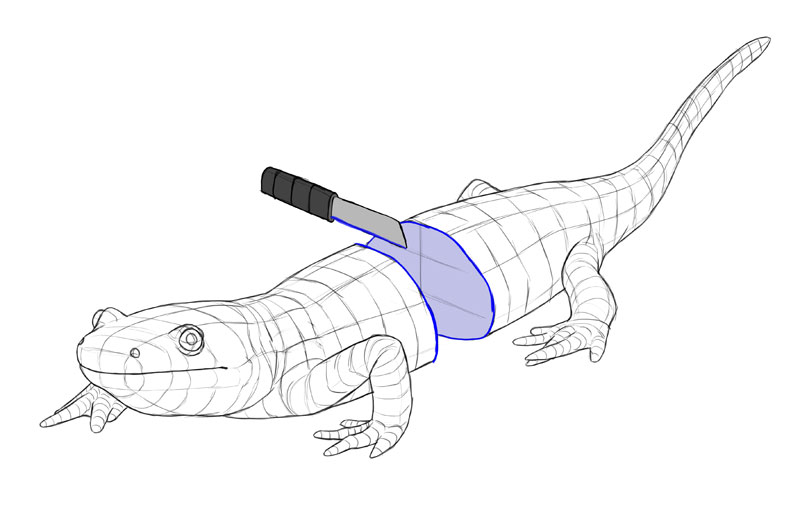
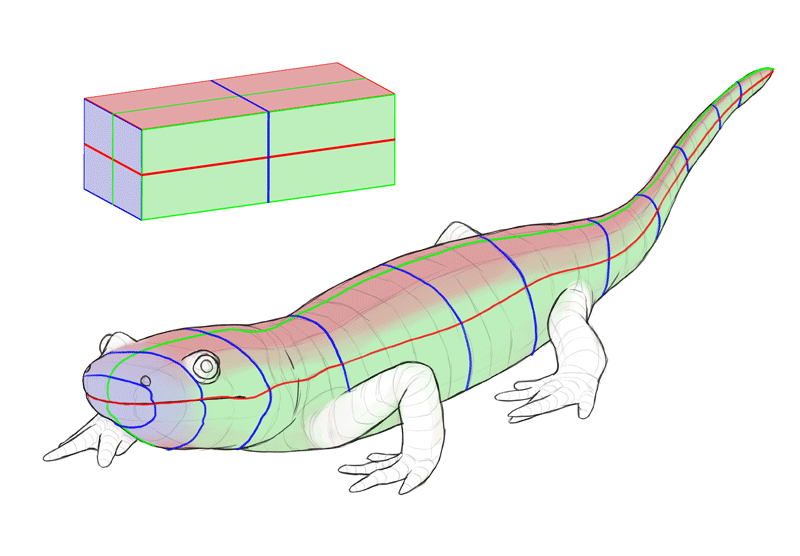
To understand information technology all better, you can effort to discover the cross-sections on your ain now, cartoon them on photos of real objects. First, "cutting" the object horizontally and vertically into halves.
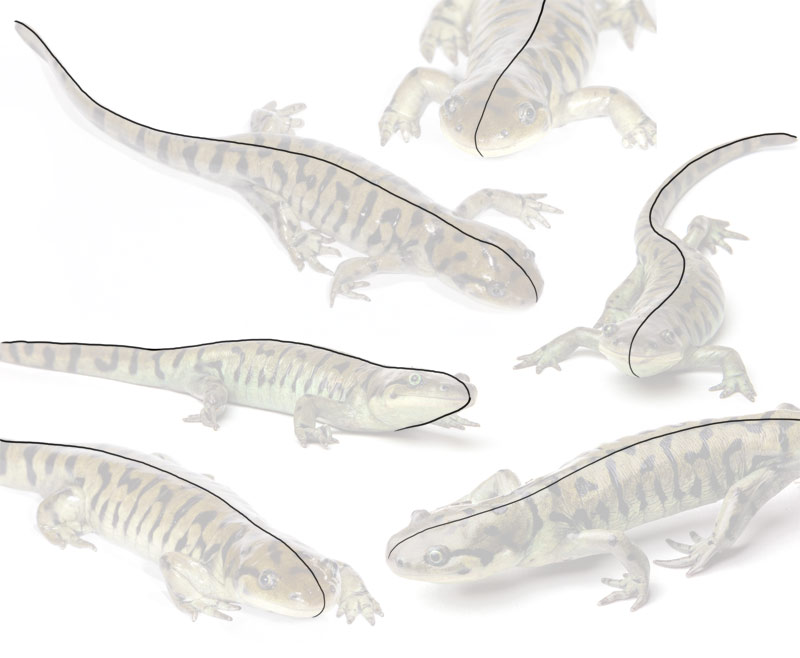
Now, find a pair of symmetrical elements in the object, and connect them with a line. This volition be the third dimension.
Once you have this management, y'all can draw it all over the object.

Continue drawing these lines, going all around the object—connecting the horizontal and vertical cross-sections. The shape of these lines should exist based on the shape of the 3rd cross-section.
One time you're done with the large shapes, yous tin can practice on the smaller ones.
You lot'll soon discover that these lines are all you need to draw a 3D shape!
Exercise 2
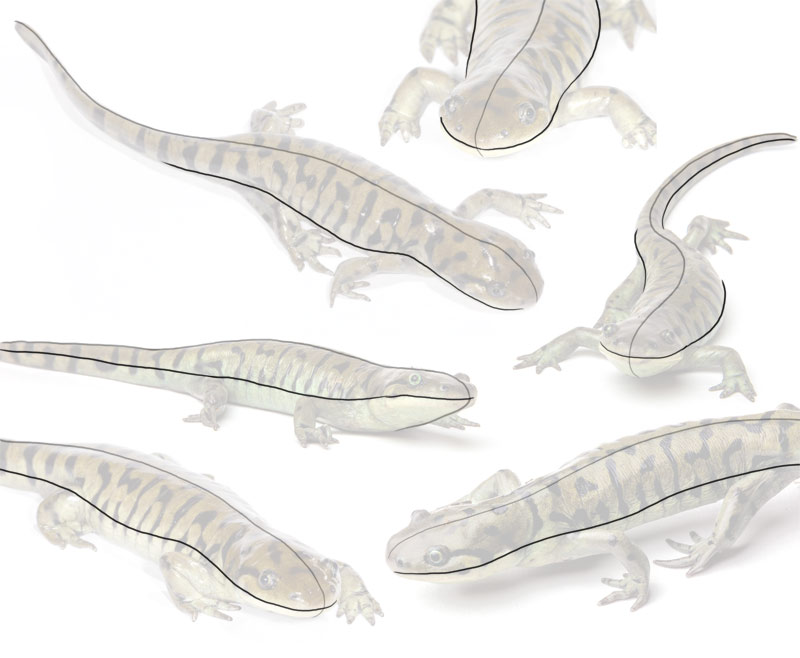
Yous can do a similar do with more complex shapes, to amend empathize how to draw them yourself. First, connect corresponding points from both sides of the trunk—everything that would be symmetrical in top view.

Mark the line of symmetry crossing the whole torso.
Finally, endeavor to find all the simple shapes that build the final class of the body.
Now you have a perfect recipe for drawing a similar animal on your own, in 3D!
My Procedure
I gave yous all the information you need to draw 3D objects from imagination. Now I'1000 going to show you my ain thinking procedure backside drawing a 3D creature from scratch, using the knowledge I presented to yous today.
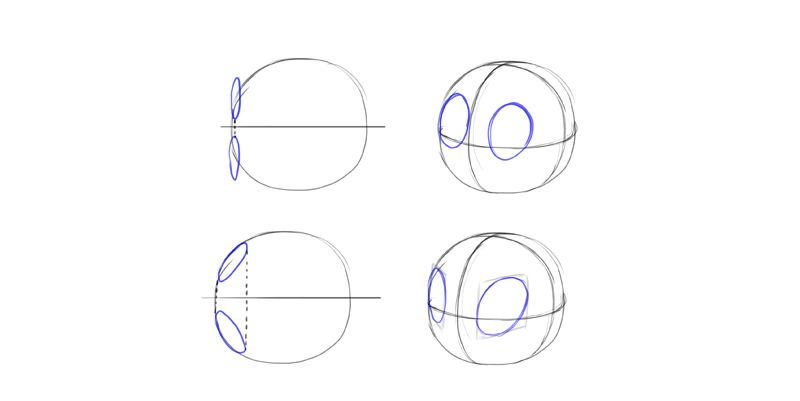
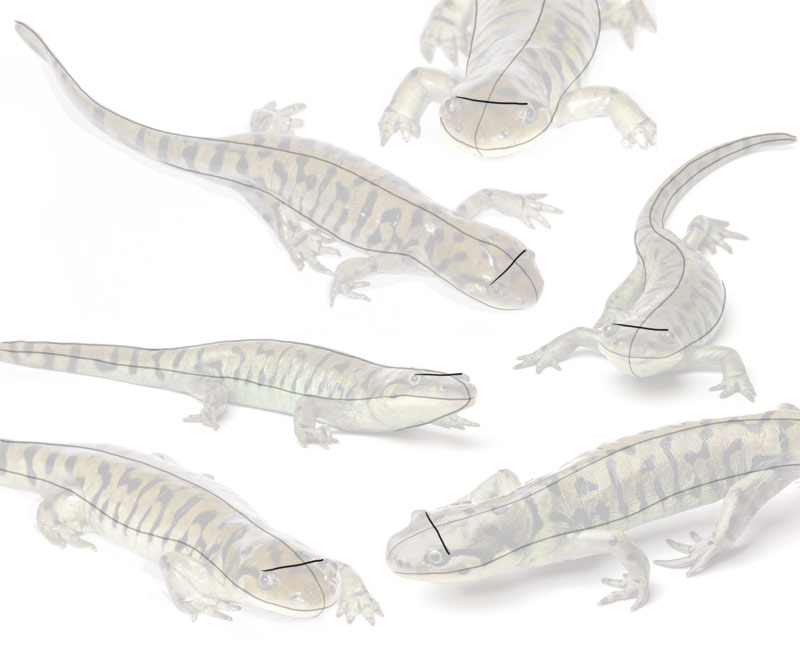
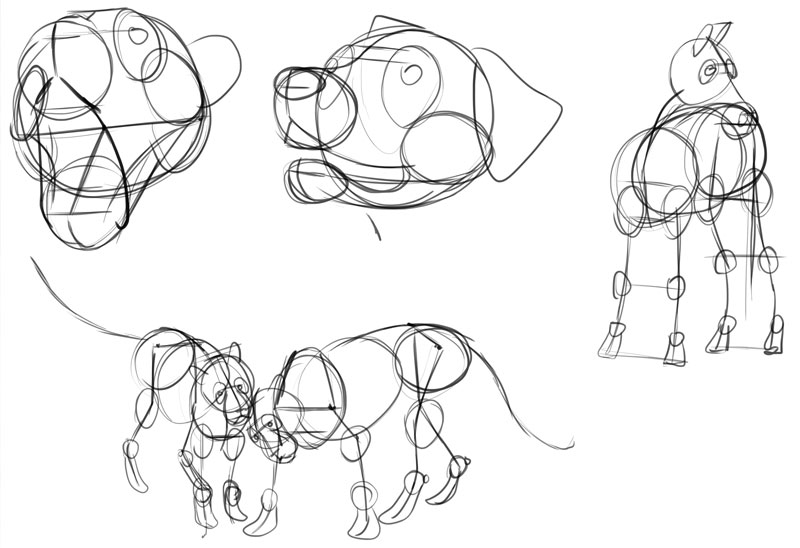
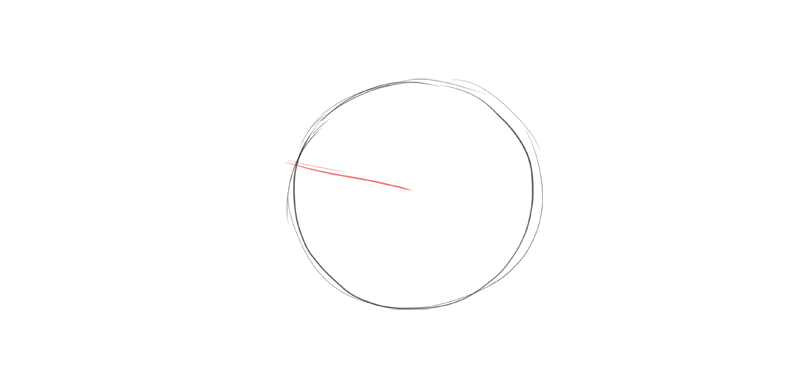
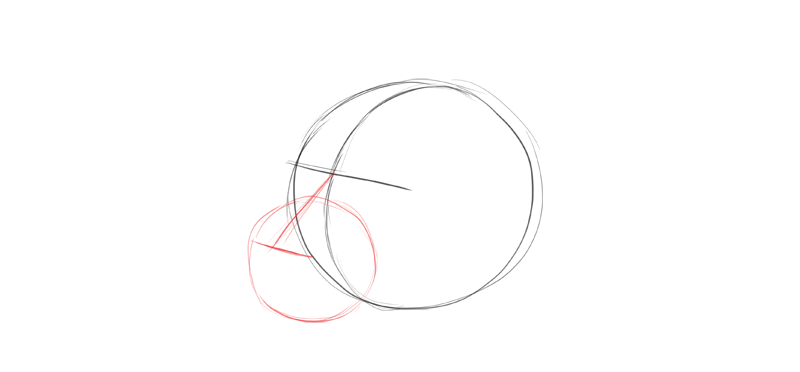
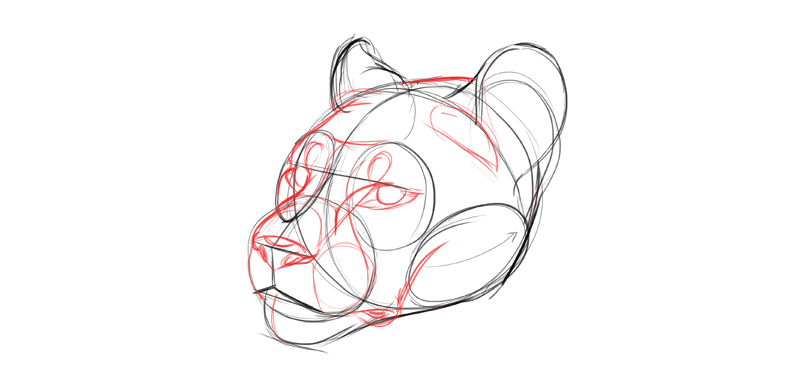
I unremarkably offset drawing an animal head with a circle. This circle should contain the cranium and the cheeks.

Next, I draw the eye line. It's entirely my determination where I desire to place information technology and at what angle. But one time I brand this decision, everything else must be adjusted to this starting time line.
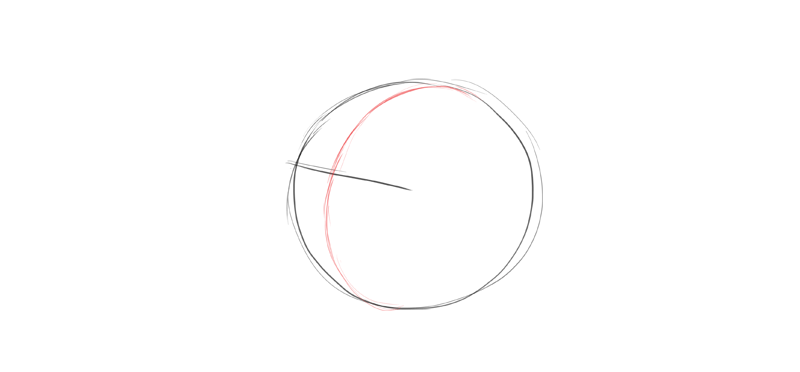
I describe the middle line betwixt the eyes, to visually separate the sphere into two sides. Can you notice the shape of a rotated ellipse?
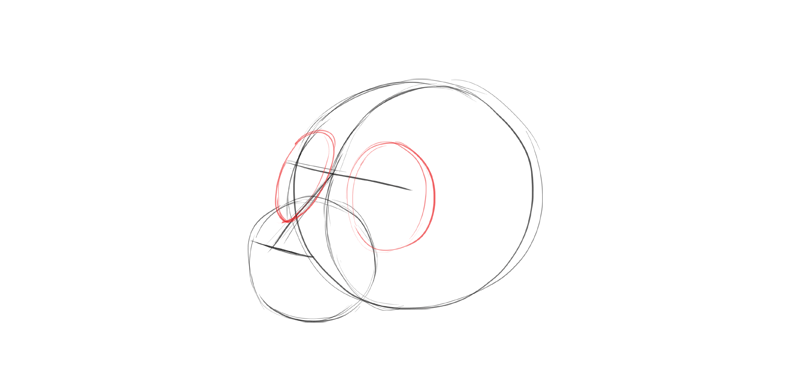
I add another sphere in the front. This will be the muzzle. I discover the proper location for information technology by drawing the nose at the aforementioned time. The imaginary airplane of symmetry should cutting the nose in half. Also, notice how the nose line stays parallel to the eye line.
I draw the the expanse of the eye that includes all the bones creating the centre socket. Such large surface area is like shooting fish in a barrel to depict properly, and it will help me add the optics later. Keep in mind that these aren't circles stuck to the forepart of the face up—they follow the curve of the main sphere, and they're 3D themselves.
The mouth is then easy to draw at this point! I just accept to follow the direction dictated past the eye line and the nose line.
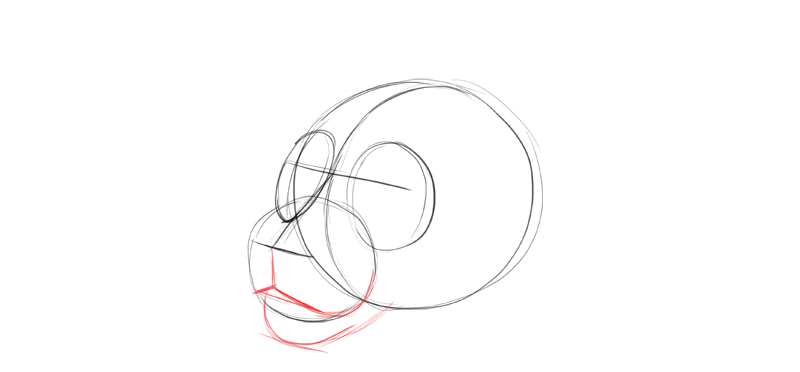
I depict the cheek and connect information technology with the mentum creating the jawline. If I wanted to draw open jaws, I would draw both cheeks—the line betwixt them would be the axis of rotation of the jaw.

When cartoon the ears, I make sure to depict their base on the same level, a line parallel to the heart line, only the tips of the ears don't have to follow this rule then strictly—it's because usually they're very mobile and can rotate in various axes.
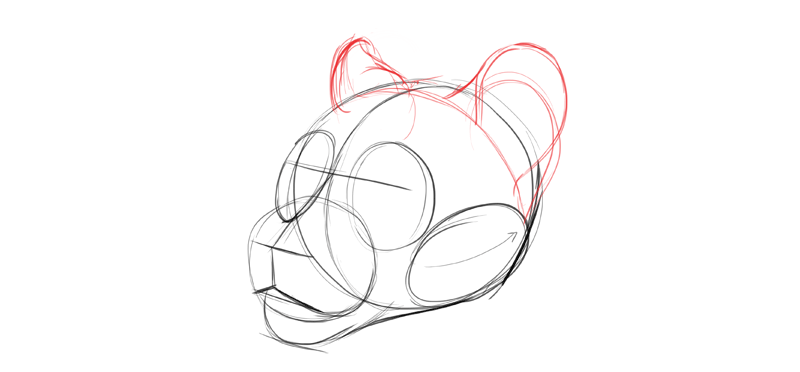
At this point, calculation the details is as easy as in a second cartoon.
That'due south All!
Information technology's the end of this tutorial, but the beginning of your learning! Y'all should now exist ready to follow my How to Describe a Large Cat Head tutorial, every bit well as my other animal tutorials. To practice perspective, I recommend animals with unproblematic shaped bodies, like:
- Birds
- Lizards
- Bears
Yous should also notice it much easier to understand my tutorial near digital shading! And if you want fifty-fifty more than exercises focused straight on the topic of perspective, you'll like my older tutorial, full of both theory and practice.
Source: https://monikazagrobelna.com/2019/11/25/drawing-101-how-to-draw-form-and-volume/
Post a Comment for "how to draw a 3d church"